Contents:
- The Real Cost of Wedding Flowers – Quick Answer
- Why Are Real Wedding Flowers So Expensive?
- Flowers Are a Perishable, Luxury Commodity
- Wedding Work Means Extra Labor
- Seasonality and Flower Selection
- What Determines the Price of Wedding Flowers?
- Guest Count and Table Numbers
- Types of Flowers
- Floral Style & Design Complexity
- Venue & Logistics
- DIY vs. Professional Florist
- Typical Wedding Flower Budgets, Broken Down
- Common Floral Elements & Average Prices
- Packages vs. Custom Quotes
- Hidden Costs to Watch
- How to Save on Real Wedding Flowers (and Where Not to Skimp)
- Make the Most of Every Stem
- Be Flexible (With Dates and Blooms)
- DIY–But With Caution
- Where Not to Cut Corners
- Real-Life Examples: What Couples Spent in 2026
- A Chic Brooklyn Wedding
- Garden-Inspired Austin Bash
- Intimate Micro-Wedding in Chicago
- FAQ: Real Wedding Flowers
- How much should I budget for real wedding flowers in 2026?
- Are real flowers more expensive than faux or silk flowers?
- Can I save money by buying flowers from Costco or Trader Joe’s?
- What’s most expensive–bouquet, arch, or centerpieces?
- When should I book my wedding florist?
- Planning Forward: Locking in Your Flower Budget
How Much Do Real Wedding Flowers Actually Cost?
Think wedding flowers are just about picking pretty peonies and roses? In 2026, the real shock for many couples comes not from the bouquet, but from the bill. For some, the cost of real wedding flowers rivals the price of the cake, the DJ, or even the dress–sometimes all three combined.
The Real Cost of Wedding Flowers – Quick Answer
For a typical US wedding in 2026, real wedding flowers cost between $2,500 and $7,500. Most couples spend close to $3,800. A more luxe or lush floral design (think lavish arches, overflowing centerpieces, or all-orchid installations) can easily run $10,000 or more. Small, simple weddings might manage with $1,500-$2,000, but DIY options aside, it’s rare to go much lower today.
| Flower Budget | What You Get |
|---|---|
| $1,500 | Bride’s bouquet, 2-3 bridesmaids, boutonnieres, a few simple table arrangements |
| $3,800 | All personals, 8-10 centerpieces, ceremony décor, some statement pieces |
| $7,500+ | Multiple installations, premium blooms, full venue transformation |
Why Are Real Wedding Flowers So Expensive?
“People ask why a bridal bouquet costs $350,” says Camila Forrester, lead designer at Atlanta’s BrightBuds Studio. “But we’re not just selling flowers. You’re paying for design, mechanics, labor, transport, and quality control–plus a whole lot of early mornings at the flower market.”
Flowers Are a Perishable, Luxury Commodity
Most wedding flowers in the US are imported–from Ecuador, the Netherlands, or Colombia–then refrigerated, rehydrated, and custom-arranged. The 2020s saw increasing costs due to labor shortages and shipping delays. In 2026, freight and climate factors have driven prices up further, especially for in-demand blooms like garden roses or ranunculus.
Wedding Work Means Extra Labor
Wedding flowers are not just “order and drop in a vase.” Florists:
- Source and inspect blooms (sometimes over several days)
- Process, hydrate, and condition each stem
- Design, assemble, and wire complex arrangements
- Deliver and set up, often on-site and under a time crunch
- Breakdown and clean up after the event
Florist labor for weddings is typically 3-10x more intensive than a standard retail order.
Seasonality and Flower Selection
Peonies in December? Expect to pay a premium. American couples sometimes request out-of-season or high-demand flowers, like dahlias in March or tulips in July. Florists may fly in these blooms at extra cost or offer comparable substitutions.
What Determines the Price of Wedding Flowers?
Not all wedding flowers are created (or priced) equally. Here’s what moves the needle most.
Guest Count and Table Numbers
The more tables you have, the more centerpieces you’ll need. An intimate micro-wedding with 20 guests may only need a handful, while a 200-person party could require 20+ centerpieces.
Types of Flowers
- Roses, carnations, greenery: More affordable, widely available
- Peonies, phalaenopsis orchids, ranunculus: Expensive, delicate, often imported
- Locally grown blooms: Sometimes cheaper in-season, but not always
Floral Style & Design Complexity
Simple, hand-tied bouquets cost less than dramatic, cascading arrangements or flower walls. Floral installations, custom arches, and hanging features are labor-intensive (and priced accordingly).
Venue & Logistics
Outdoor summer ceremony? Expect extra charges for tenting, water sources, and heat protection. Historic venue with limited elevator access? Labor costs rise.
DIY vs. Professional Florist
DIYing your flowers from Costco or Sam’s Club can bring the budget down to $500-$1,200 for basic personals and centerpieces. But you’ll need willing hands, some design knowledge, and time.
“You’re not just buying flowers. You’re investing in an experience–and the peace of mind that comes from knowing someone else is wrangling those 300 stems at 7am.”
– Avery Lin, owner, Lin Floral, Los Angeles
Typical Wedding Flower Budgets, Broken Down
Knowing where the money goes helps prioritize. Here’s the rough cost breakdown for real wedding flowers in 2026:
Common Floral Elements & Average Prices
- Bridal bouquet: $200-$350
- Bridesmaid bouquet: $75-$150 each
- Boutonniere: $15-$30 apiece
- Corsage: $25-$45
- Ceremony arch: $600-$2,000
- Low centerpiece: $125-$250
- Tall/lush centerpiece: $250-$550
- Aisle décor/petals: $200-$600
Prices from Real Wedding Reports by WeddingWire and 2026 pricing surveys from U.S. florists.
Packages vs. Custom Quotes
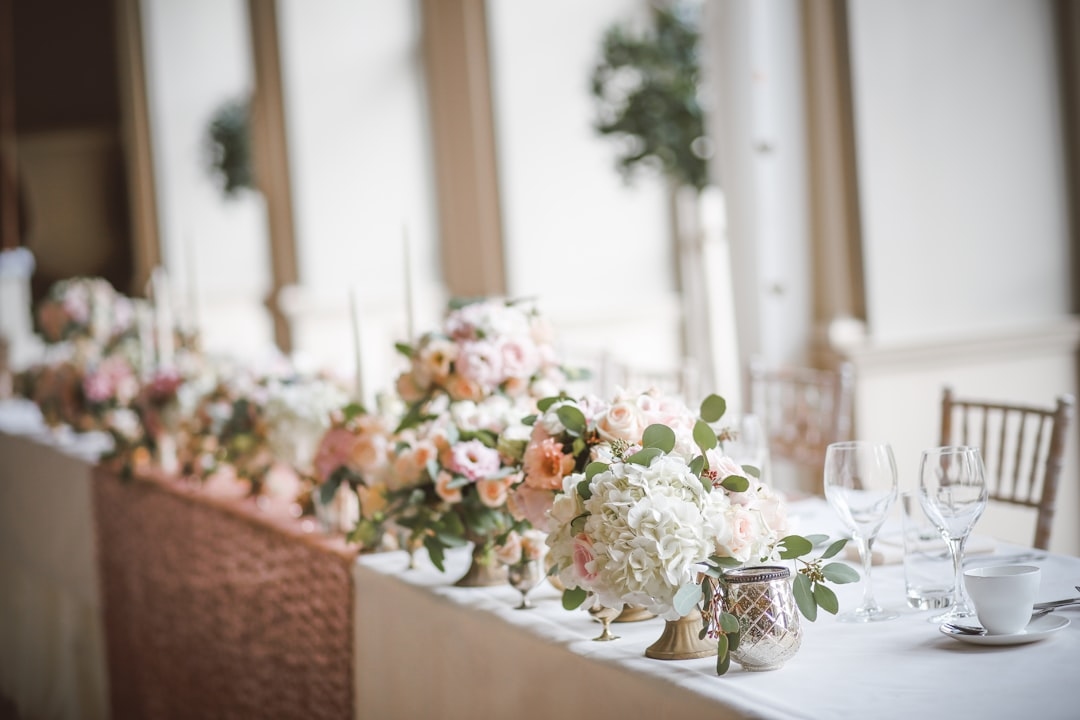
Some florists offer wedding packages at set prices, covering all “core” floral needs. Others design custom quotes based on your inspiration photos or Pinterest boards. Packages often save time and money but may have limited flower choices.
Hidden Costs to Watch
- Delivery/setup: $200-$800 (more for large or remote venues)
- Rental items (vases, arches, candles): $100-$1,000+
- Clean-up/strike fee: $150-$400
How to Save on Real Wedding Flowers (and Where Not to Skimp)
Want those magazine-worthy blooms without wrecking your budget? Smart choices and flexibility can save hundreds–sometimes thousands.
Make the Most of Every Stem
- Reuse ceremony flowers at the reception. Aisle arrangements double as head table décor.
- Go lush with greenery. Eucalyptus, ruscus, and ferns are less costly fillers.
- Mix premium and budget blooms. Pair a few peonies with standard roses and lisianthus for a luxe look on less.
- Focus flowers where they’ll show in photos. Scale back on guest tables; splurge on bouquet and ceremony arch.
Be Flexible (With Dates and Blooms)
Move your date to peak bloom season for your favorite flower (e.g., May/June for peonies). Or, trust your florist to select “designer’s choice” in-season stems for the best value and quality.
DIY–But With Caution
Ordering bulk flowers from Floral Express or The Bouqs can cut costs, but DIY isn’t for the faint of heart. Arrange bouquets a day or two before your wedding, and assign a reliable helper for set-up and clean-up. Many couples find DIY practical for small, intimate weddings–less so for 100+ guests or elaborate installations.
Where Not to Cut Corners
Professional handling and artistry matter most for bouquets, boutonnieres, and eye-catching installations. Wilting, unbalanced, or amateur arrangements stand out (for the wrong reasons) in wedding photos.
Real-Life Examples: What Couples Spent in 2026
A Chic Brooklyn Wedding
- Guests: 90
- Flower spend: $4,200
- Florals included: Bridal bouquet, 3 bridesmaid bouquets, 5 boutonnieres, ceremony arch, 10 bud vase cluster centerpieces, statement bar arrangement.
Florist: Petal & Stem Brooklyn
Garden-Inspired Austin Bash
- Guests: 150
- Flower spend: $7,850
- Florals included: Bride, 4 bridesmaids, 8 groomsmen, parents, large arch + aisle, 15 lush centerpieces, greenery chandeliers, floral cake decoration.
Florist: Wildflower Collective, Austin
Intimate Micro-Wedding in Chicago
- Guests: 25
- Flower spend: $1,450
- Florals included: Bride + partner bouquet, 2 boutonnieres, 4 table arrangements, petals for ceremony.
Florist: Evergreen & Co, Chicago
FAQ: Real Wedding Flowers
How much should I budget for real wedding flowers in 2026?
Most US couples spend $2,500-$7,500 on real flowers in 2026, with the national average around $3,800. Budgets depend on guest count, design complexity, and flower choices.
Are real flowers more expensive than faux or silk flowers?
Yes, professionally designed real wedding flowers usually cost more than faux or silk alternatives, but the gap is narrower than you might think for high-quality faux options. Real flowers deliver unmatched scent, texture, and impact in person and photos.
Can I save money by buying flowers from Costco or Trader Joe’s?
Yes. You can buy bulk flowers from big-box or grocery stores for $100-$500 and arrange them yourself, but this works best for small weddings. You’ll still need to factor in time, supplies, and some skill for arranging.
What’s most expensive–bouquet, arch, or centerpieces?
Ceremony arches and large floral installations are typically the priciest individual items, sometimes over $2,000. Bouquets and centerpieces vary, but lush designs (with peonies, orchids, or cascading styles) will cost more.
When should I book my wedding florist?
In 2026, book your florist 8-12 months before your wedding, especially for popular spring or summer dates. Top florists book out early, and advance booking secures your spot and price.
Planning Forward: Locking in Your Flower Budget
Your wedding flowers shape the vibe–down to the scent in the air and the backdrop in every photo. Start conversations with local florists early, bring inspiration photos, and be honest about your budget upfront. In 2026, flexibility and creativity unlock the most beautiful results, whatever you spend. For some couples, scaling back on guest count instead of style lets them say “yes” to their dream blooms. For others, focusing on a just-right bouquet–one that feels effortless, personal, and real–is worth every penny.
Your budget, your priorities. Make your wedding flowers count.